
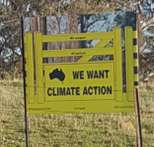
 Most signs are made from corflute, and those dispatched by CANsign should last 24 months or more outdoors in UV light.
Consider the best position for your sign that attracts passing traffic. If you are in a heavy public traffic zone, consider hanging it higher up away from threats (animals etc). Front fences, gates and balconies are ideal.
Use tape or blue tack on the inside of windows in homes or vehicles.
The simplest option is to affix the sign with wire or ties to a fence or sturdy structure, and especially so if the sign has eyelets.
For signs being placed outside with no eyelets, poke a hole in the top/bottom with a screwdriver or similar tool at least 10mm in from the end to avoid it ripping to the edge due to stresses. You can also choose to insert some eyelets (grommets) if you are keen.
Make your own eyelets? Grommets:
Eyelets or grommets can be found at Bunnings, rubber or metal, in different sizes. Bunnings also offer a tool kit (shown) for under $17 – this will help you to install the grommet. However, you may choose the rubber option as they are easier to install, and without a tool. Moderns signs now have heat seal eyelets which do not use metal or plastic inserts, but instead are processed using a tool to heat, compress and punch holes into the corflute edges making the signs easier to recycle.
Tie-wire is thin metal wire suitable for front fences and long lasting and a good environmental option. Ensure the wire is fastened tight with pliers to stop the sign from moving in the wind.
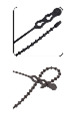 These are like cable or zip ties but are reusable and can be purchased at Bunnings stores or online. You must push and listen for a ‘click’ noise to know the tie is secure. Pull to unclick. Great for attaching to existing structures.
Being made of plastic they are durable, but unfortunately not recyclable. Common at any hardware, they come in two styles, internal use (white) and external use (black). There are several thicknesses and lengths. For signs with eyelets these are a quick and sturdy option, especially for windy locations.
Occasionally problems can occur with signs hanging outside on a front fence. If you are concerned about them being tampered with, you may choose to affix them to stakes inside your boundary.
 Metal stakes or star pickets can be the most durable and already have convenient holes. Using two stakes for large or square or oblong signs helps avoid a sign flapping in the wind. Star stakes should be put in so the flat side of the sign touches two edges the stake. Ideal for signs with eyelets. These metal stakes require a heavy hammer or sledgehammer, or ideally a star picket post (pictured) if you happen to be a farmer or know someone who has one.
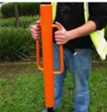
While cheaper and quick to erect, affixing can be tricky. Since these can be harder timber, it is wiser to pre-drill holes in the stakes rather than trying to hammer in nails. You can use also use Tek Screws which have a better grip on the signs. When tying to the stakes ensure they are tight against the frames to avoid them swinging in the wind.
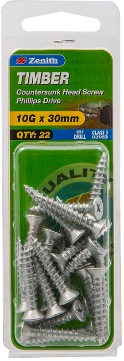 These galvanised Timber screws may be a bit long for a thin tomato stake, so look for 15mm or 20mm length screws if the stake being used is too narrow. You’ll need a “Phillips head” screwdriver or drill bit. This packet is about $5 at Bunnings stores.
The key thing is to have a wide head that will not sink through the corflute. Adding small washer to a flat head screw can be a good option. Alternatively, “Button head” screws which are flat (not countersunk) and round like a button, can be useful also as long as you can find some with a large enough length and thickness. Less than 10g thickness is likely to be too small. Pre-drill slightly less than the thickness of the screw, especially into hard timber.
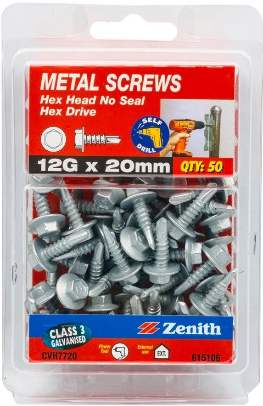
 A simpler and quicker option is to screw in a ‘Tek’ or “hex head” screw. Even though they are normally used for affixing to metal, these screws have an ideal flat flange around the screw head, and they will also hold into timber. Some come with rubber grommets as they are used for fixing to sheet metal roofs. You can leave the rubber grommet on the screws or take them off, it doesn’t matter as the corflute will flex.
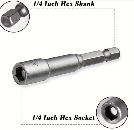
These Tek screws do require a specific hex head drill attachment (as shown) to screw them in, but they are common with most drill kits and found in many home sheds. Ensure the hex head tool fits the screw head. Use the drill on a slow speed so you don’t put the screw entirely through the sign.
Recycling and reuse Options:
The corflute is made of Polypropylene (PP) and some councils and commercial enterprises recover them and turn them into new products. e.g. Corex plastics in Melbourne. See http://www.corex.net.au/services for their services. Consider approaching your council to ask for the same options. FYI, CANA and CANsign use a national network of Printers who work to high environmental principles, such as sending their excess to recycling facilities, including those that offer recycled material or alternatives to corflute. Contact us about the Enviro-Print network and also the Register of recycling facilities being developed.
There are also a myriad of useful reuse options for corflute such as tree-guards, backing boards and even insulation in walls.